Ad triggering
Notice
Ad triggering requires the optional Makalu SCTE 35 add-on.
The ad triggering feature enables you to signal ad insertion opportunities that downstream systems can use to automatically replace specific parts of your content.
Workflow and use cases
The underlying workflow is based on the SCTE 35 and SCTE 104 standards, enabling you to schedule splicing trigger points as secondary events in your program, which are subsequently included in the playout output signal/data stream. Downstream systems can evaluate these splicing trigger points to perform server-side or player-side ad insertion.
In addition to ad insertion, splicing events can be used for various other purposes, such as regional content variations (opt-out: replacing or blanking content for specific regions), blanking content on the web, or triggering recording servers.
For more information about the technical details of the corresponding standards, refer to the official specifications on the SCTE website:
Event signaling
In accordance with the mentioned standards, splicing events must be signaled in the data stream 4 seconds before the actual event start. Makalu applies this pre-roll time (which is configurable as part of its playout configuration) during a regular automatic switchover from a scheduled clip to the next by starting to signal the splicing event 4 seconds before the clip with the assigned event starts.
If instead a manual switch is made (e.g. manually ending a live broadcast) and the next clip has a splicing event assigned, the system starts signaling the event immediately but delays the switchover to the next clip by 4 seconds. This logic applies regardless of whether the source clip is a live broadcast or a file-based clip.
Depending on its properties, a splicing event can be stopped either automatically or manually. For an automatic splicing event, the end event trigger is automatically sent when the playback of the corresponding clip or show is finished. A manual splicing event must be stopped manually by an operator.
Splicing event types
Makalu provides the following splicing event types:
| Makalu splicing event type | Matching splice command according to SCTE 35/104 specifications |
|---|---|
| Avail | Corresponds to the legacy splice command splice_insert |
| Time Signal | Corresponds to the newer splice command time_signal and provides additional configuration properties |
The type of splicing event you need to use for your application depends on the configuration of your downstream systems and what data your target platforms expect.
Adding splicing events to the rundown
You can add splicing events to clips (primary events) in the rundown using the following applications:
- Via Makalu Traffic - to add splicing events manually during program planning
- Via Makalu Automation - to add splicing events manually at short notice
- Via Makalu Playlist Importer - to add splicing events automatically, based on the data provided by an external traffic system (for more information, see the section Playlist Import)
Makalu also supports adding multiple splicing events to a single clip. This is useful if your playout output signal/data stream is delivered to multiple target platforms. Typically, a corresponding splicing event is configured in Makalu for each target platform. This enables you to add multiple of these events to a clip, providing each target platform with the specific splicing data they expect.
Notice
If you want to use multiple splicing events at the same time, the playout output must be configured appropriately, by enabling multiple lines for the broadcast of splicing events.
Additionally, Makalu supports adding splicing events seamlessly to consecutive clips and to groups. Adding a splicing event to the first clip of a group applies the event to all clips in the group.
Adding a splicing event in Makalu Traffic
Notice
The following steps assume that you have already created a show and want to add a splicing event to a clip within the show. For information about how to create a new show, see the section Creating a show.
To add a splicing event to a clip:
-
In the sidebar on the left, select Shows.
All available shows of the currently selected channel are listed in the middle.
-
Select the show to be edited and click Open at the right end of the corresponding row.
The show details are displayed.
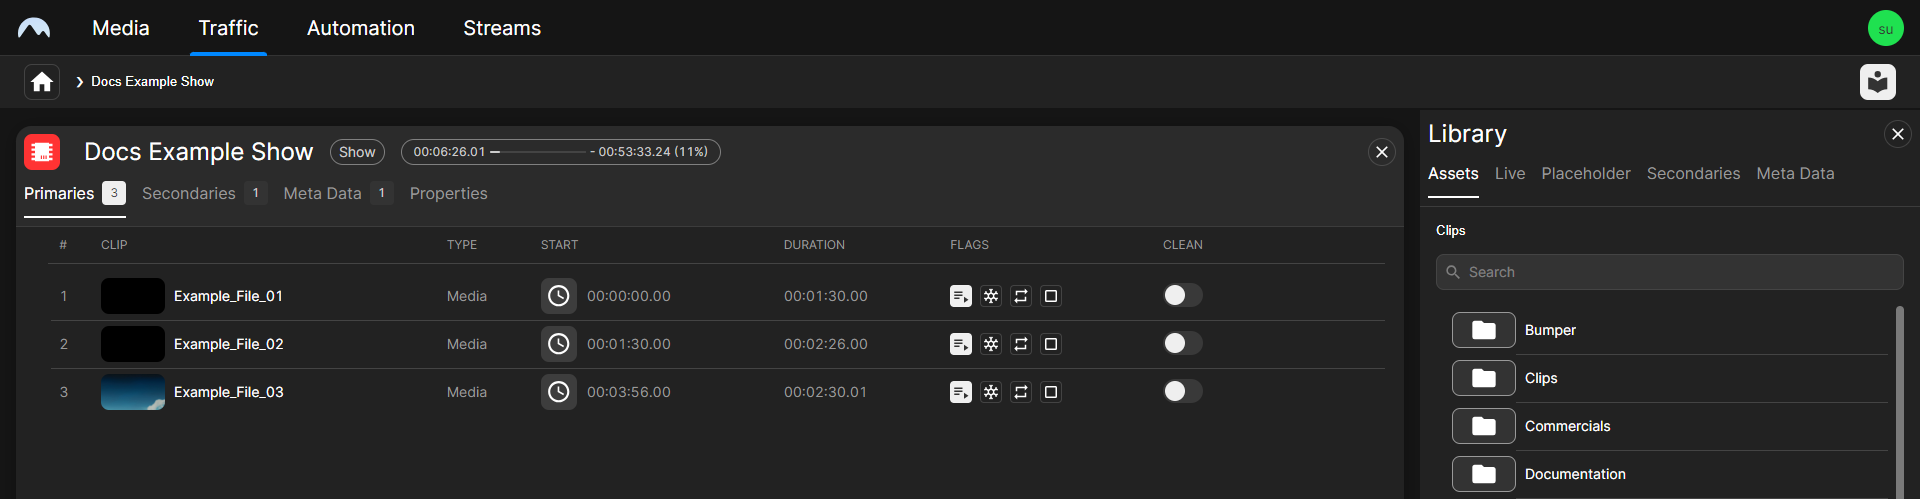
Traffic - Show details -
In the Library on the right, select Secondaries > Splicing.
All available splicing secondary events are listed below.
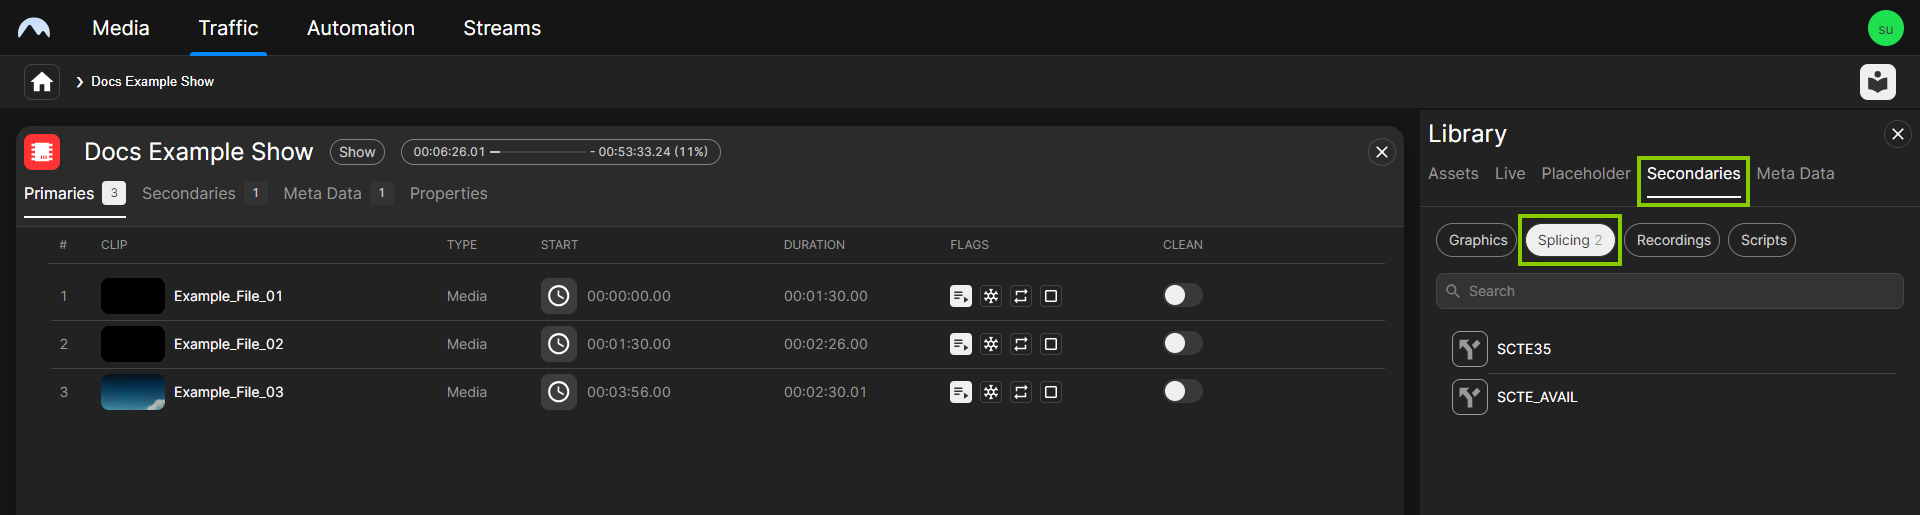
Traffic - Available splicing secondary events -
Drag the splicing event to be added onto the corresponding clip.

Traffic - Splicing event added to a clip The splicing event is added to the clip, and the event icon is displayed to the right of the clip name.
-
If necessary, edit the secondary event properties as follows:
-
Select the clip.
The clip details are displayed on the right.
-
In the clip details, select the Secondaries tab.
All secondary events added to the clip are listed.
-
Hover your mouse over the secondary event to be edited and click Open at the right end of the corresponding row.
The secondary event properties are displayed.
-
Edit the available properties as required.
Notice
For detailed information about available splicing event properties, see the section Splicing properties.
-
To confirm your changes, click Save.
-
The changes are saved.
Tip
To delete a splicing event from a single clip:
-
In the clip list of the show, select the corresponding clip.
-
In the clip details area on the right, select the Secondaries tab.
-
Hover your mouse over the splicing event to delete and click the Delete icon
 on the right of the corresponding row.
 -
In the confirmation dialog, click Remove.
The splicing event is removed from the clip.
Adding a splicing event in Makalu Automation
In Makalu Automation there are two ways to add a splicing event to a clip in the rundown:
- Adding an event based on a pre-configured and reusable template.
- Adding an event for one-time use.
Available pre-configured/template-based splicing events are listed in the Media tab under Secondary Events > Splicing. Their types and properties are preset to match the values required by the downstream systems in your specific Makalu environment. These events can be added to clips in the rundown via drag-and-drop, just like other secondary events (for more information, see the section Adding secondary events to the rundown).
A splicing event for one-time use can be added to a clip via the toolbar above the rundown. Its type and properties must be configured manually each time it is added.
Template-based splicing events
To add a template-based splicing event to a clip:
-
On the right, select the Media tab.
All available media items are listed in the media list in the lower area of the Media tab.
-
In the media list, select Secondary Events > Splicing.
All available splicing secondary events are listed to the right.
-
Select a splicing secondary event and drag it on a clip in the rundown.
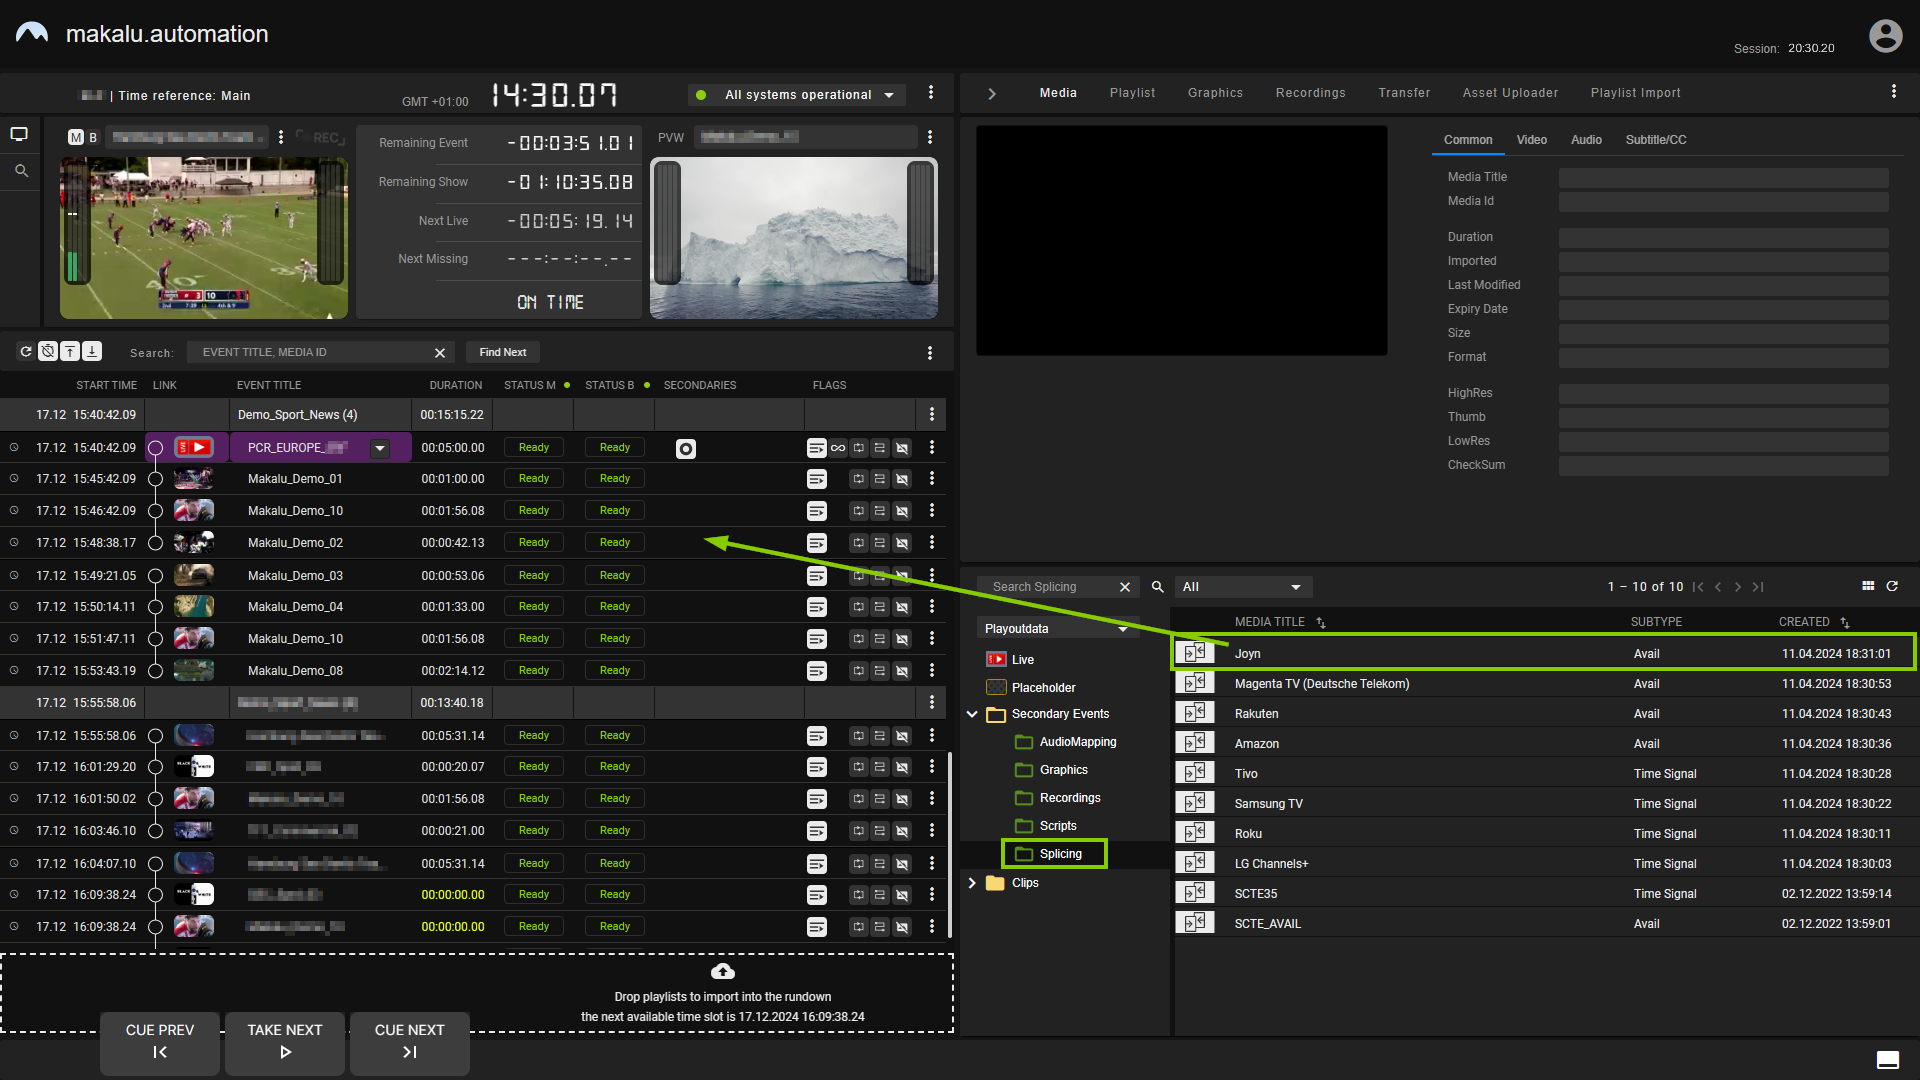
Automation - Add a splicing secondary event to the rundown The splicing event is added to the clip in the rundown. It is recognizable by the Splicing event icon
 in the Secondaries column.
Tip
To apply a splicing event to a group of clips instead of a single clip, add it to the first clip of the corresponding group.
-
(Optional) Edit the properties of the added splicing event as follows:
-
In the rundown, click the Splicing event icon
in the Secondaries column of the corresponding clip.Details about the secondary event expand below.
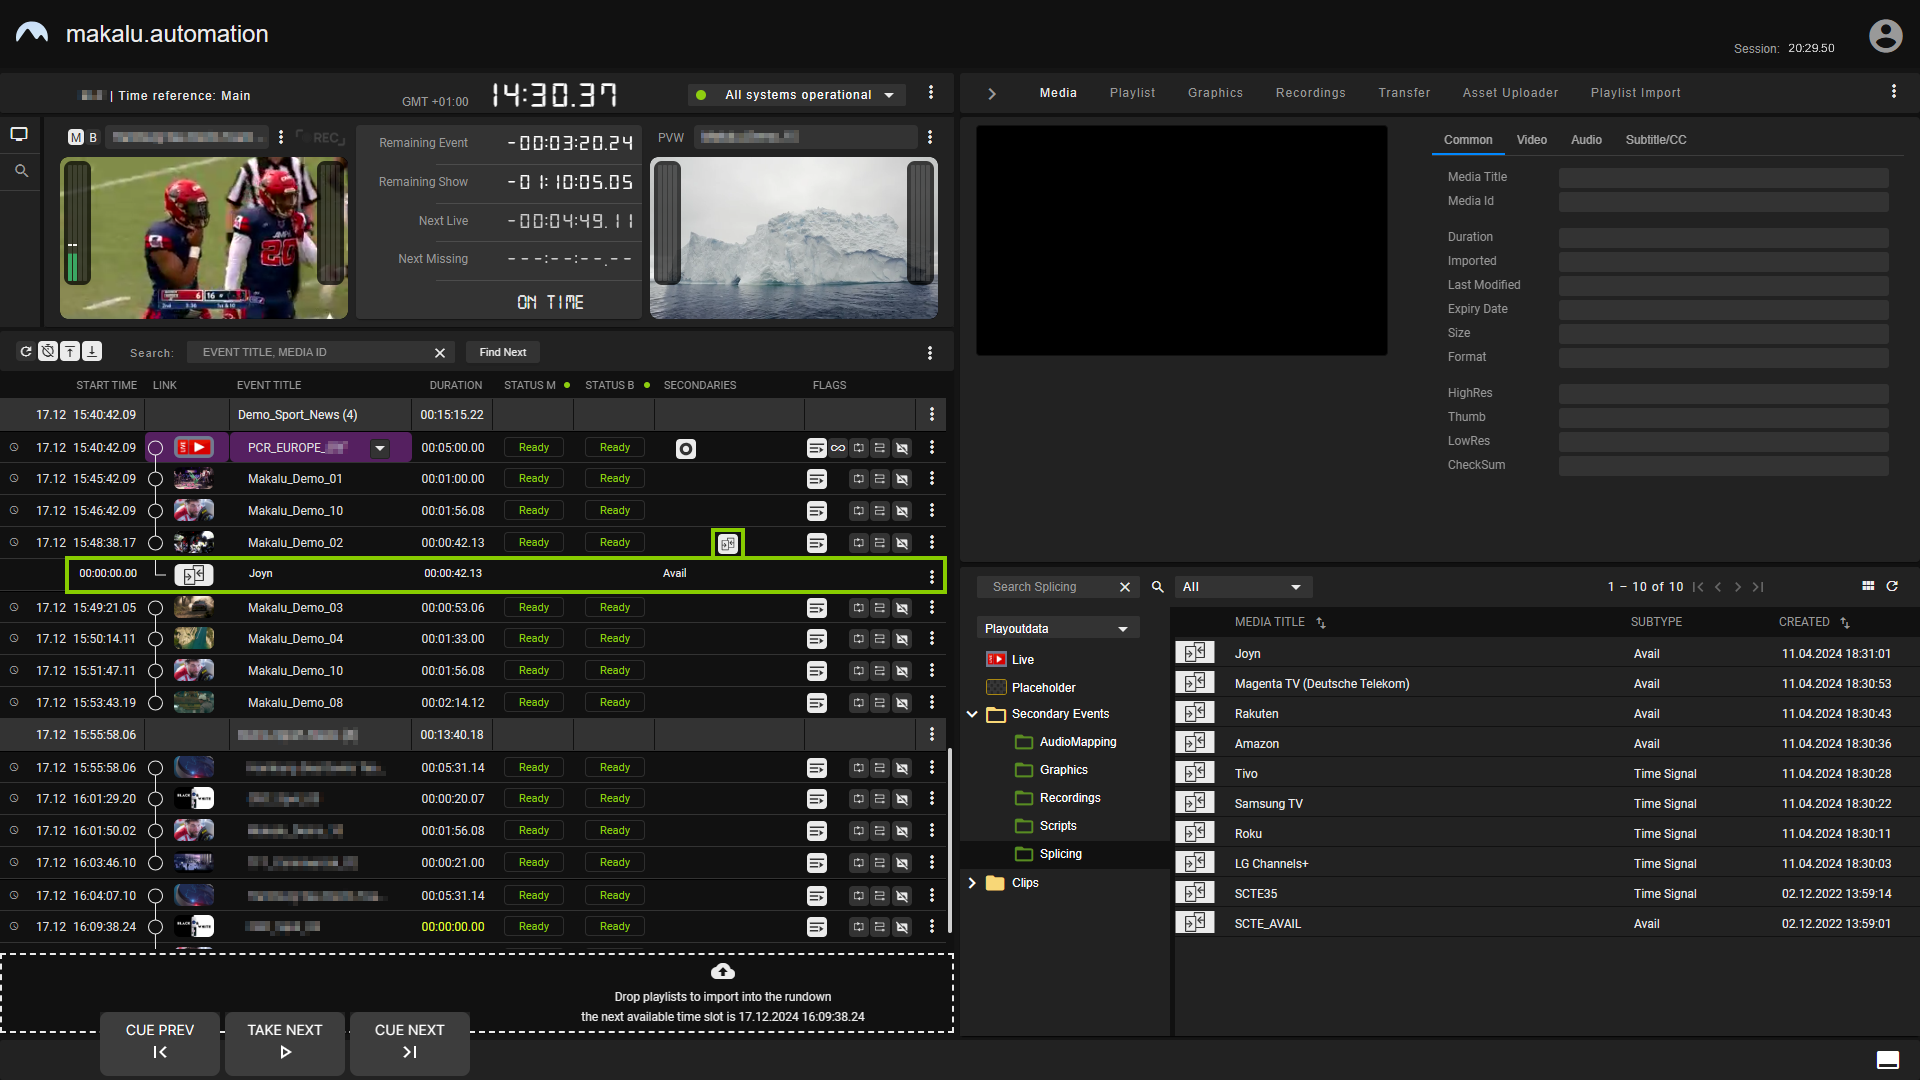
Automation - Splicing event details -
Click the Options icon
 on the right of the expanded row and select Edit Secondary.
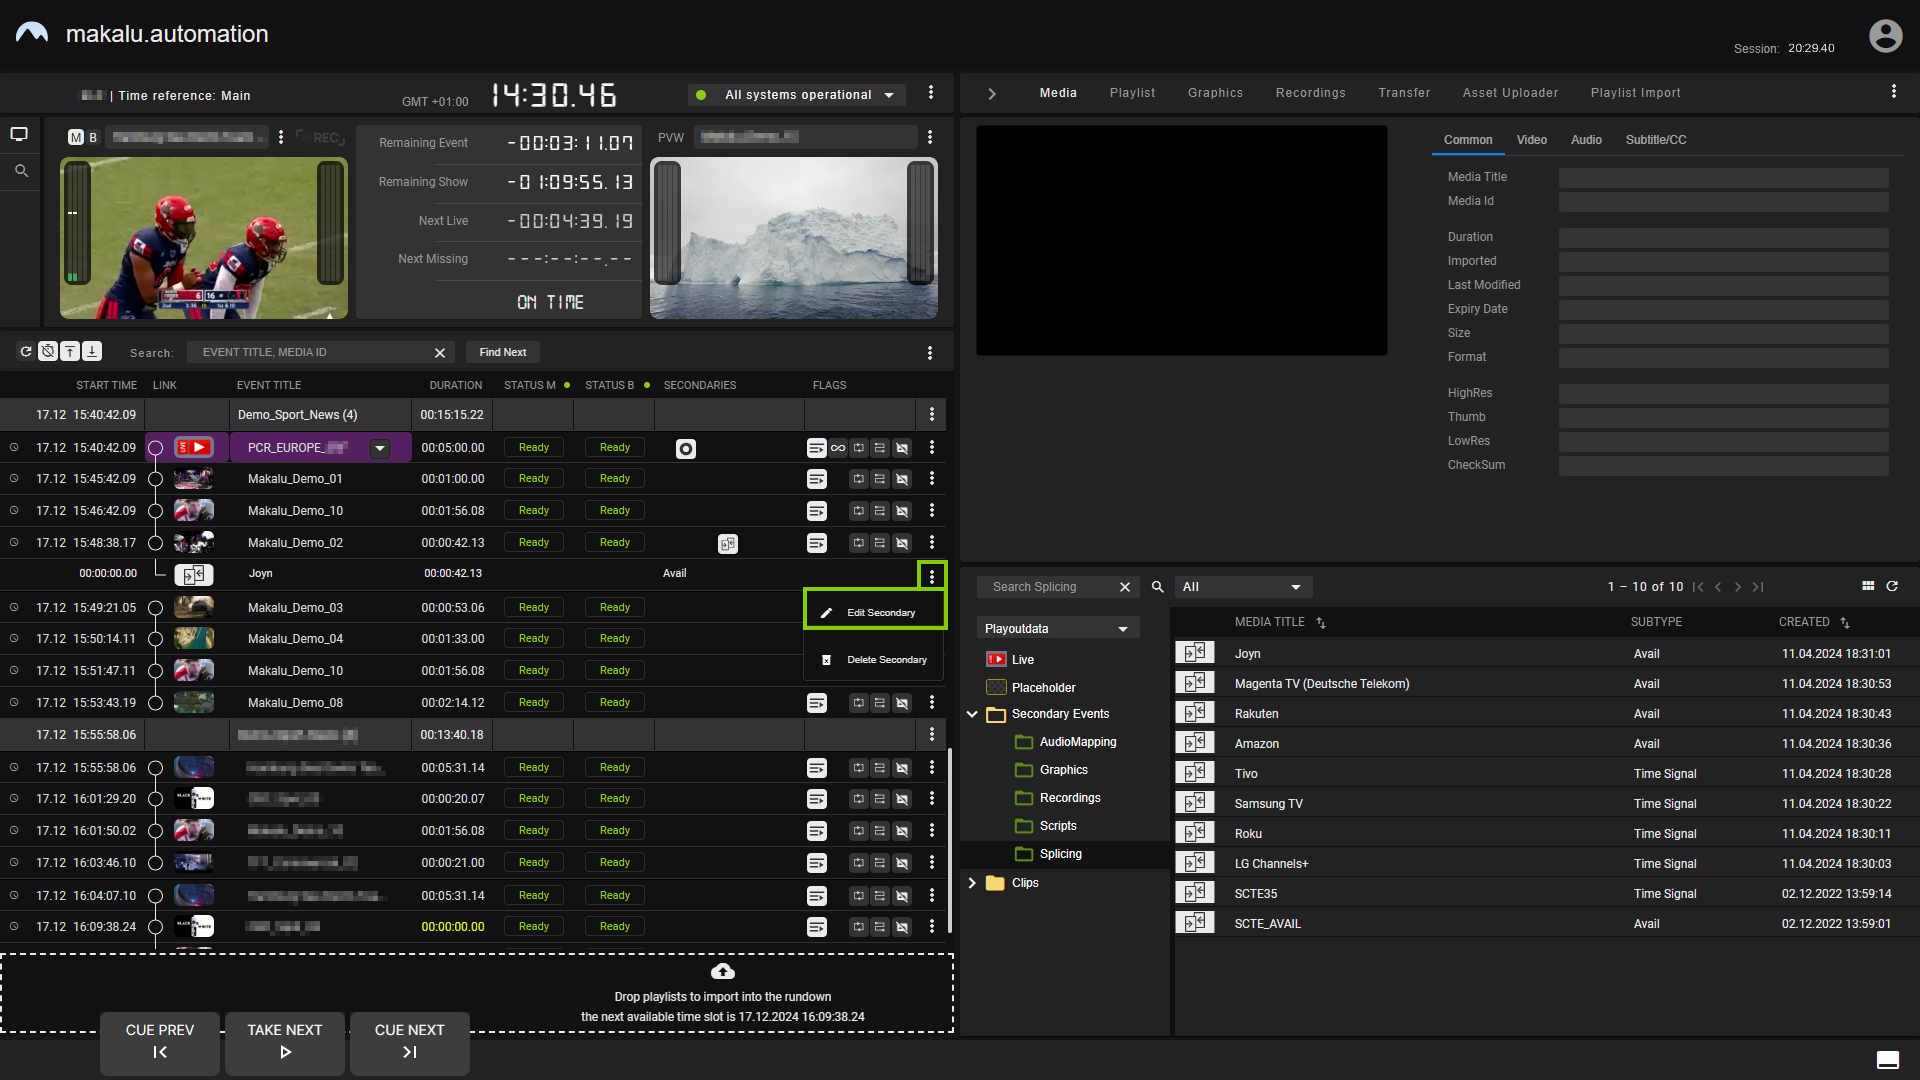
Automation - Open event properties -
In the Edit secondary event menu, edit the properties as required.
Notice
For detailed information about available splicing event properties, see the section Splicing properties.
-
Confirm your changes by clicking Apply.
The properties of the splicing event are saved.
-
-
(Optional) To add more splicing events to the corresponding clip, repeat steps four and five.
Tip
To remove a splicing event from a clip:
-
In the rundown, click the Splicing event icon
in the Secondaries column of the clip from which you want to remove a splicing event.Details about the secondary event expand below.
-
Click the Options icon
on the right of the expanded row and select Delete secondary. -
In the confirmation dialog, click Yes.
The splicing event is removed from the clip.
One-time splicing events
To add a one-time splicing event to a clip:
-
In the rundown, select the clip to which you want to add a splicing event.
-
In the toolbar above the rundown, click the Add splicing for selected clip icon
 .
. -
In the Create splicing event menu, select the event type (Avail or Time Signal).
-
Configure the event properties as required.
Notice
The available properties vary depending on the selected event type. For detailed information about available splicing event properties, see the section Splicing properties.
-
Confirm your action by clicking Apply.
The splicing event is added to the selected clip.
Tip
To apply a splicing event to a group of clips instead of a single clip, add it to the first clip of the corresponding group.
Tip
You can optionally save an added one-time splicing event with its current configuration as a template, allowing you to reuse it.
To save a splicing event as a template:
-
Click the Splicing event icon
in the Secondaries column of the corresponding clip. -
Click the Options icon
on the right of the expanded row and select Save as. -
In the following menu, enter a unique name for the template.
-
Click Apply.
The splicing event is saved as a template and listed under Media > Secondary Events > Splicing. You can add it to a clip in the rundown as described in section Template-based splicing events.
-
-
(Optional) To add more splicing events to the corresponding clip, repeat steps two to six.
Tip
To remove a splicing event from a clip:
-
In the rundown, click the Splicing event icon
in the Secondaries column of the clip from which you want to remove a splicing event.Details about the secondary event expand below.
-
Click the Options icon
on the right of the expanded row and select Delete secondary. -
In the confirmation dialog, click Yes.
The splicing event is removed from the clip.